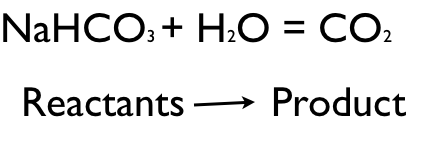
Starting materials in a chemical reaction are called reactants. The materials you end up with in a chemical reaction are called products. An arrow indicates that a chemical change has taken place.
All reaction have on thing in common: there is a rearrangement of chemical bonds. Chemical reactions always involve breaking old bonds, forming new bonds, or both. In all reactions we still have all of the same atoms at the end that we had at the start. In every reaction there can never be any missing atoms or new ones. Chemical reactions only rearrange the the bonds in the atoms that are already there.
To make water out of hydrogen and oxygen, If you only use 2 Hydrogen (H2) and 2 Oxygen (O2) we would end up with a water molecule and one O molecule left over. We must have the same atoms present before and after the reaction. In a balanced chemical reaction the same # is present before and after. To make the equation for H2O balanced we need 4 Hydrogen atoms (2 H2) and 2 Oxygen atoms (O2) to make 2 H2O molecules. Which is the same as:
This idea is called the law of conservation of mass. There must be the same atoms and the same # of atoms before and after the reaction.
To make the following equation balanced (_Cu + _O ---> _CuO) there must be 2 Copper atoms and 1 Oxygen atom to make 2 CuO molecules. In the unbalanced equation there are 2 Cu atoms and 2 O atoms -----> 2 Cu atoms and 1 O atom. We need to add CuO atoms to the product because this equation doesn’t make lone O atoms. Now there are enough O atoms but there aren’t enough Cu atoms. Therefore we must add more Cu atoms.This makes the balanced equation for this reaction 2 Cu + O2 -----> 2 CuO, which is the same thing as saying the reactants have 2 Cu atoms and so does the product. The reactants have 2 O atoms and so does the product.
The balanced equation for _ CH4 + _ O2 ---> _H2O + _ CO2 is 1Ch4 + 2 O2 -----> 2H2O + 1 CO2.
The balanced equation for _N2 + _H2 --->_NH33 is 1 N2 + 3 H2 ------> 2 NH3.
The balanced equation for _ KClO3 ---> _ KCl + _ O2 is 2 KCIO3 -------> 2 KCI + 3 O2.
The balanced equation for _ Al + _O2 --->_ Al2O3 is 4 Al + 3 O2 --------> 2 Al2O3.
In summary, chemical reactions always involve breaking bonds, making bonds, or both. The law of conservation of mass says chemical reactions can rearrange bonds but there must be the same amount of atoms present before and after the change. To balance a chemical equation you change the coefficients in front of each atom or molecule until there are the same # of each type of atom before and after the reaction.
All reaction have on thing in common: there is a rearrangement of chemical bonds. Chemical reactions always involve breaking old bonds, forming new bonds, or both. In all reactions we still have all of the same atoms at the end that we had at the start. In every reaction there can never be any missing atoms or new ones. Chemical reactions only rearrange the the bonds in the atoms that are already there.
To make water out of hydrogen and oxygen, If you only use 2 Hydrogen (H2) and 2 Oxygen (O2) we would end up with a water molecule and one O molecule left over. We must have the same atoms present before and after the reaction. In a balanced chemical reaction the same # is present before and after. To make the equation for H2O balanced we need 4 Hydrogen atoms (2 H2) and 2 Oxygen atoms (O2) to make 2 H2O molecules. Which is the same as:
# of atoms in Reactants | Element | # of atoms in product |
4 | H | 4 |
2 | O | 2 |
This idea is called the law of conservation of mass. There must be the same atoms and the same # of atoms before and after the reaction.
To make the following equation balanced (_Cu + _O ---> _CuO) there must be 2 Copper atoms and 1 Oxygen atom to make 2 CuO molecules. In the unbalanced equation there are 2 Cu atoms and 2 O atoms -----> 2 Cu atoms and 1 O atom. We need to add CuO atoms to the product because this equation doesn’t make lone O atoms. Now there are enough O atoms but there aren’t enough Cu atoms. Therefore we must add more Cu atoms.This makes the balanced equation for this reaction 2 Cu + O2 -----> 2 CuO, which is the same thing as saying the reactants have 2 Cu atoms and so does the product. The reactants have 2 O atoms and so does the product.
The balanced equation for _ CH4 + _ O2 ---> _H2O + _ CO2 is 1Ch4 + 2 O2 -----> 2H2O + 1 CO2.
The balanced equation for _N2 + _H2 --->_NH33 is 1 N2 + 3 H2 ------> 2 NH3.
The balanced equation for _ KClO3 ---> _ KCl + _ O2 is 2 KCIO3 -------> 2 KCI + 3 O2.
The balanced equation for _ Al + _O2 --->_ Al2O3 is 4 Al + 3 O2 --------> 2 Al2O3.
In summary, chemical reactions always involve breaking bonds, making bonds, or both. The law of conservation of mass says chemical reactions can rearrange bonds but there must be the same amount of atoms present before and after the change. To balance a chemical equation you change the coefficients in front of each atom or molecule until there are the same # of each type of atom before and after the reaction.